For a current work project, we need to load images like most web applications. With one mind on performance I'd like those images to be different sizes dependant on the device viewing them and be served in the most efficient format (e.g. webP, AVIF etc). There are many services that provide this functionality as a software as a service with two of the most well know being Cloudinary and imgIX.
However I needed to keep costs down and would need to roll my own. Rather fortuitously the application is built on Next.js and version 10 introduces the Next.js image component.
The Next.js Image component is amazing, out of the box it will lazy load images, resize, optimize and serve in modern formats when the web browser supports it.
A separate requirement is those images would need to be served by an s3 bucket without making the bucket public. In part 1 I'll set up a demo one page showcasing the image component in action. In part 2 I'll run through pulling those in from AWS.
Setup
I'll assume you have a modern version of Node.js which includes npm. To quickly setup the build tools etc. I'm going to use create-next-app. In a terminal execute the following command:
npx create-next-app my-app && cd my-app
That will install the required dependencies and navigate to the project directory. To start the application run the following command:
npm run dev
In VS Code or your editor of choice, open the project and in pages/index.js, remove everything inside main tag
<h1 className={styles.title}>
Welcome to <a href="https://nextjs.org">Next.js!</a>
</h1>
<p className={styles.description}>
Get started by editing{' '}
<code className={styles.code}>pages/index.js</code>
</p>
<div className={styles.grid}>
<a href="https://nextjs.org/docs" className={styles.card}>
<h3>Documentation →</h3>
<p>Find in-depth information about Next.js features and API.</p>
</a>
<a href="https://nextjs.org/learn" className={styles.card}>
<h3>Learn →</h3>
<p>Learn about Next.js in an interactive course with quizzes!</p>
</a>
<a
href="https://github.com/vercel/next.js/tree/master/examples"
className={styles.card}
>
<h3>Examples →</h3>
<p>Discover and deploy boilerplate example Next.js projects.</p>
</a>
<a
href="https://vercel.com/import?filter=next.js&utm_source=create-next-app&utm_medium=default-template&utm_campaign=create-next-app"
className={styles.card}
>
<h3>Deploy →</h3>
<p>
Instantly deploy your Next.js site to a public URL with Vercel.
</p>
</a>
</div>
For the images, I went to unsplash and downloaded 10 to 15. Initially I'll just hard code these before uploading to a AWS bucket.
Back in index.js, add the Import for the Nextjs image component
import Image from 'next/image';
Add the component:
<image src="/images/altanbagana-jargal-_eMbrsvO7jc-unsplash.jpg" width="{640}" height="{300}" />
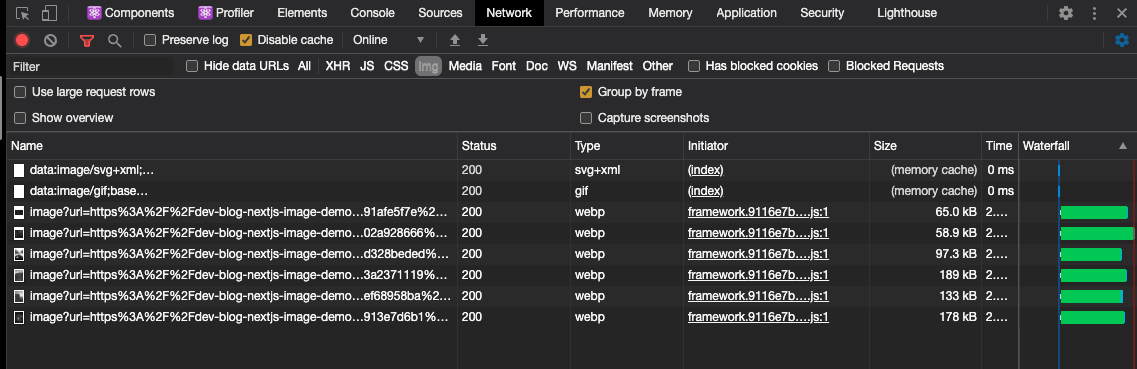
Repeat for as many images as you have. And thats it. Now open the network tab in devtools and you'll see this image are much smaller than 1MB+ and the format is webP (dependant on browser):